1992-1997 Cadillac Seville SLS STS LED High Mounted Third Brake Light Removal
Cut the 8 lower fasteners holding the rear compartment lid carpet trim (near license plate area). We will provide you with new fasteners.
Remove the 5 nuts (11mm or 7/16) securing the taillight.
Disconnect electrical connector (blue and black wires).
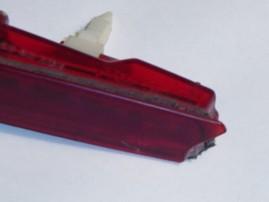
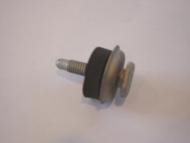
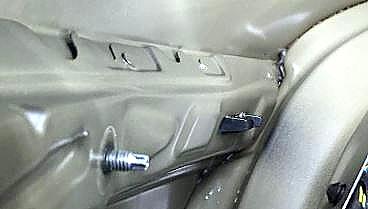
IMPORTANT: While the deck lid is open and the lid cover is pulled down, look toward the inside corners of the deck lid (same area as nuts) and you should be able to see the white 'christmas tree' clips. You will need to cut these clips off using snippers/wire cutters (Stanley 74-438 works great; a blade from a hacksaw also works well). Try to cut as much of the clip off as possible. Once the clips are cut you should be able to remove the taillight. *See important message and picture below.
Do not reuse white 'christmas tree' clips. Do not over tighten nuts. Only snug the nuts to fit the brake light to the deck lid.
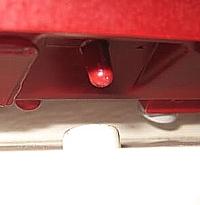
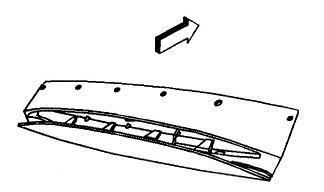
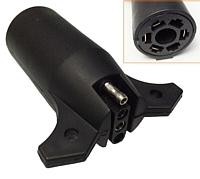
*IMPORTANT:BROKEN STUDS ARE OK. BROKEN END TIPS ARE NOT. DO NOT PRY ON THE BRAKE LIGHT TO REMOVE. THIS CAN RESULT IN A BROKEN END TIP. BROKEN END TIPS CANNOT BE REPAIRED AND WILL NOT BE ACCEPTED FOR CORE CREDIT. SEE PICTURE BELOW.
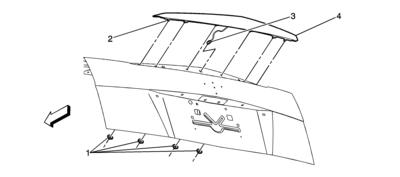
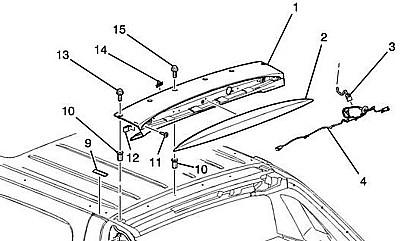
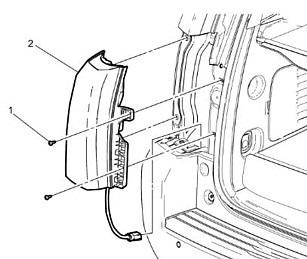
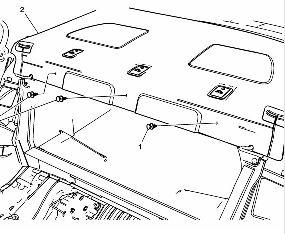
Disconnect the high mounted stoplamp connector (5) from the wiring harness. Press the grommet (4) from the rear compartment lid.
Remove the bolts (2) retaining the high mounted stoplamp panel (1) to the rear compartment lid (3).
Pull the high mounted stoplamp panel (1) downward to disengage it from the rear compartment lid (3).
Remove the high mounted stoplamp panel (1) and place it face down on a clean protective surface.
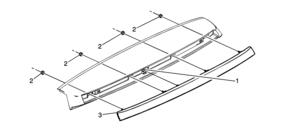
Remove the bolts (1) retaining the high mounted stoplamp (2) to the filler panel (3).
Install the bolts (1) to retain the high mounted stoplamp (2) to the filler panel (3). Tighten the high mounted stoplamp mounting bolts to 2 N·m (18 lb in).
Inspect the rear compartment lid (2) to ensure that the upper retainers (1) and the lower retainers (3) are present. If the retainers are damaged they should be replaced.
Position the high mounted stoplamp panel (1) to allow the high mounted stoplamp connector (5) and the grommet (4) to pass through the rear compartment lid (3). Ensure that the grommet (4) is fully seated in the rear compartment lid (3). Connect the high mounted stoplamp connector (5) with the wiring harness.
Position the high mounted stoplamp panel (1) on the rear compartment lid (3) and press it upwards to engage the locator tabs.
Install the bolts (2) to retain the high mounted stoplamp panel (1) to the rear compartment lid (3). Tighten the high mounted stoplamp panel retaining bolts to 2 N·m (18 lb in).
Please note: All 1998- mid 2001 Seville lamps leak water. 100% failure. The current only repair/ fix is to replace the lamp with a mid 2001 or newer replacement. The current replacement GM part is #25697411.
Disconnect the high mounted stop lamp connector from the wiring harness.
Remove the fasteners securing the high mounted stop lamp to the rear compartment lid applique.
Remove the high mounted stop lamp from the rear compartment lid applique and place it face down on a clean protective surface.
Installation Procedure
Install the high mount stop lamp to the rear compartment lid applique.
Notice
Use the correct fastener in the correct location. Replacement fasteners must be the correct part number for that application. Fasteners requiring replacement or fasteners requiring the use of thread locking compound or sealant are identified in the service procedure. Do not use paints, lubricants, or corrosion inhibitors on fasteners or fastener joint surfaces unless specified. These coatings affect fastener torque and joint clamping force and may damage the fastener. Use the correct tightening sequence and specifications when installing fasteners in order to avoid damage to parts and systems.
Install the fasteners in order to secure the high mounted stop lamp to the rear compartment lid applique. Tighten
Tighten the high mounted stop lamp fasteners to 6 N·m (53 lb in).
Connect the high mount stop lamp electrical connector.
2008, 2009, 2010, 2011, 2012 CTS LED Third Brake Light Removal
2008, 2009, 2010, 2011, 2012 CTS LED third brake light.
Special note Escalade ESV and Escalade EXT owners!
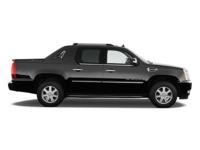
Attention Escalade EXT and SUV owners! From a short distance the EXT third lamp resembles the SUV third brake lamp version. In fact, they are two completly different lamps. The EXT lamp is made by a different supplier, has a different vehicle mounting design, and has different internal electronics.
The Escalade EXT and Escalade SUV lamps are not interchangable.
2002-2006 Cadillac Escalade LED brake light removal.
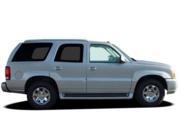
2002, 2003, 2004, 2005, 2006 Cadillac Escalade and ESV SUV High Mounted LED Third Stop Lamp Replacement
Remove the retainers (3 screws, near window hinge area) from the stop lamp.
Lower the lift gate window.
Raise the stop lamp to disconnect the electrical connector from the lamp.
Remove the center high-mounted stop lamp from the vehicle.
Installation Procedure
Connect the electrical harness to the stop lamp.
Install the center high-mounted stop lamp onto the vehicle.
Raise the lift gate window.
Notice
Use the correct fastener in the correct location. Replacement fasteners must be the correct part number for that application. Fasteners requiring replacement or fasteners requiring the use of thread locking compound or sealant are identified in the service procedure. Do not use paints, lubricants, or corrosion inhibitors on fasteners or fastener joint surfaces unless specified. These coatings affect fastener torque and joint clamping force and may damage the fastener. Use the correct tightening sequence and specifications when installing fasteners in order to avoid damage to parts and systems.
Install the retainers into the holes. Tighten
***Tighten the retainers to 1.2 N·m (10 lb in).***
Close the lift gate window.
Warning! Do not overtighten screws. Overtighting screws can crack the rear brake light housing. This will create water leaks. There is no warranty coverage for overtightened screws.
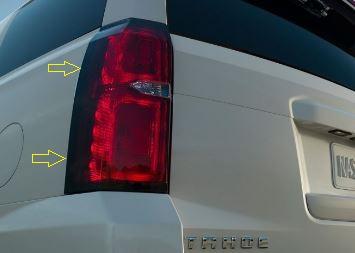
LED, Left, Driver, Right, Passenger Side SUV, Yukon Denali
Gently pry to remove the soft, flexible plastic gutter trim.
Remove (2) T15 size Torx screws, gently wiggle straight back to remove tail light. Disconnect harness clip retainer and bulb socket from the tail light. We do not need the wire harness for lamp repairs.
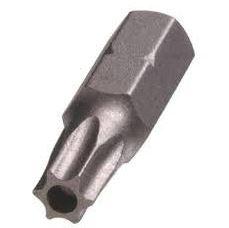
Torx T15 bit. These are available everywhere. Can be a bit, socket or wrench.
Current pricing Harbor Freight kit 64282 as of 01/10/2020.
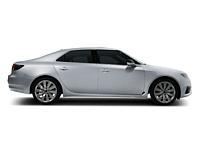
2010-2011 SAAB 9-5 tail lamp, trunk light bar, third brake light removal.
2010-2011 SAAB 9-5 Third Brake Light
Fold down rear seat.
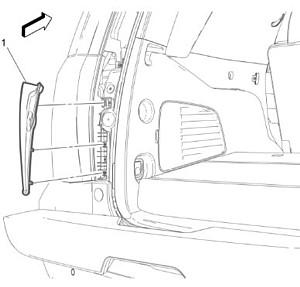
Remove rear C pillar trim.
Remove package shelf.
Remove third brake light.
2010-2011 SAAB 9-5 Aero LED Tail Light
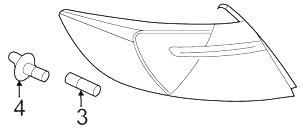
2010-2011 SAAB 9-5 LED tail light, #3 tail light bulb, #4 tail light bulb socket.
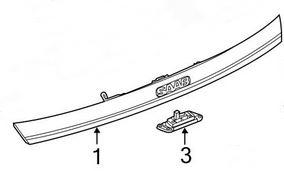
2010-2011 SAAB 9-5 Aero LED Trunk Light Bar
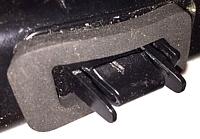
Removal caution. Each end of the 2010-2011 SAAB 9-5 trunk light bar uses a built in push clip. These clips are the big challenge to getting the lamp out. You need to squeeze
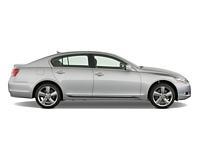
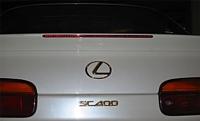
1992-2005 Lexus models including SC300, SC400, some Toyota Corolla models, Third Brake Light Replacement
Lexus SC300, SC400 LED third brake light. Stanley 8796, Toyota 24-25 SAE U89, Stanley 24-40, 8898.
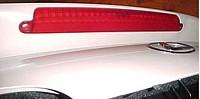
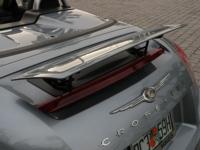
Lexus SC300, SC400, some Toyota Corollas with factory spoiler third brake light.
Lexus third brake lights. We are currently fixing both decklid mounted and spoiler mounted Stanley / Toyota third brake lights used on various Lexus models and the SC 300 and SC 400. Call for details.
***This area is under development.***
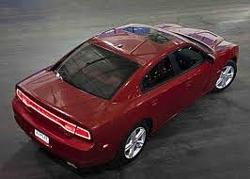
2012 Dodge Charger LED tail lights, LED rear panel. AKA the racetrack lamp.